iOS 오토 레이아웃 파헤치기
iOS 오토 레이아웃 파헤치기
1. Editor를 사용하면서 개꿀팁
Zeplin 같이 View와 View 사이의 상대 길이를 알아내는 법
 한 View를 선택하고 alt 키를 누른 상태로 커서를 다른 View 위로 올리면
위와 같이 그 View 와의 거리가 나타난다.
한 View를 선택하고 alt 키를 누른 상태로 커서를 다른 View 위로 올리면
위와 같이 그 View 와의 거리가 나타난다.
디버깅 중에 View Hierarchy 및 Size, Property가 보고 싶을 때
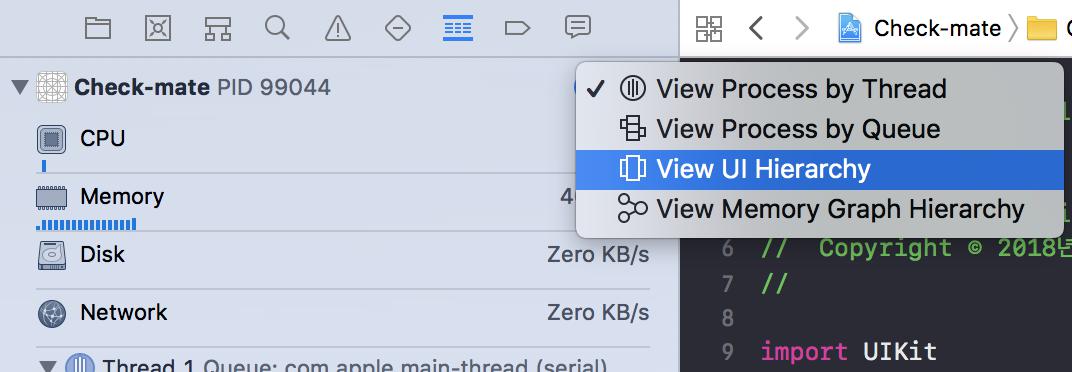 View UI Hierarchy 를 클릭하면
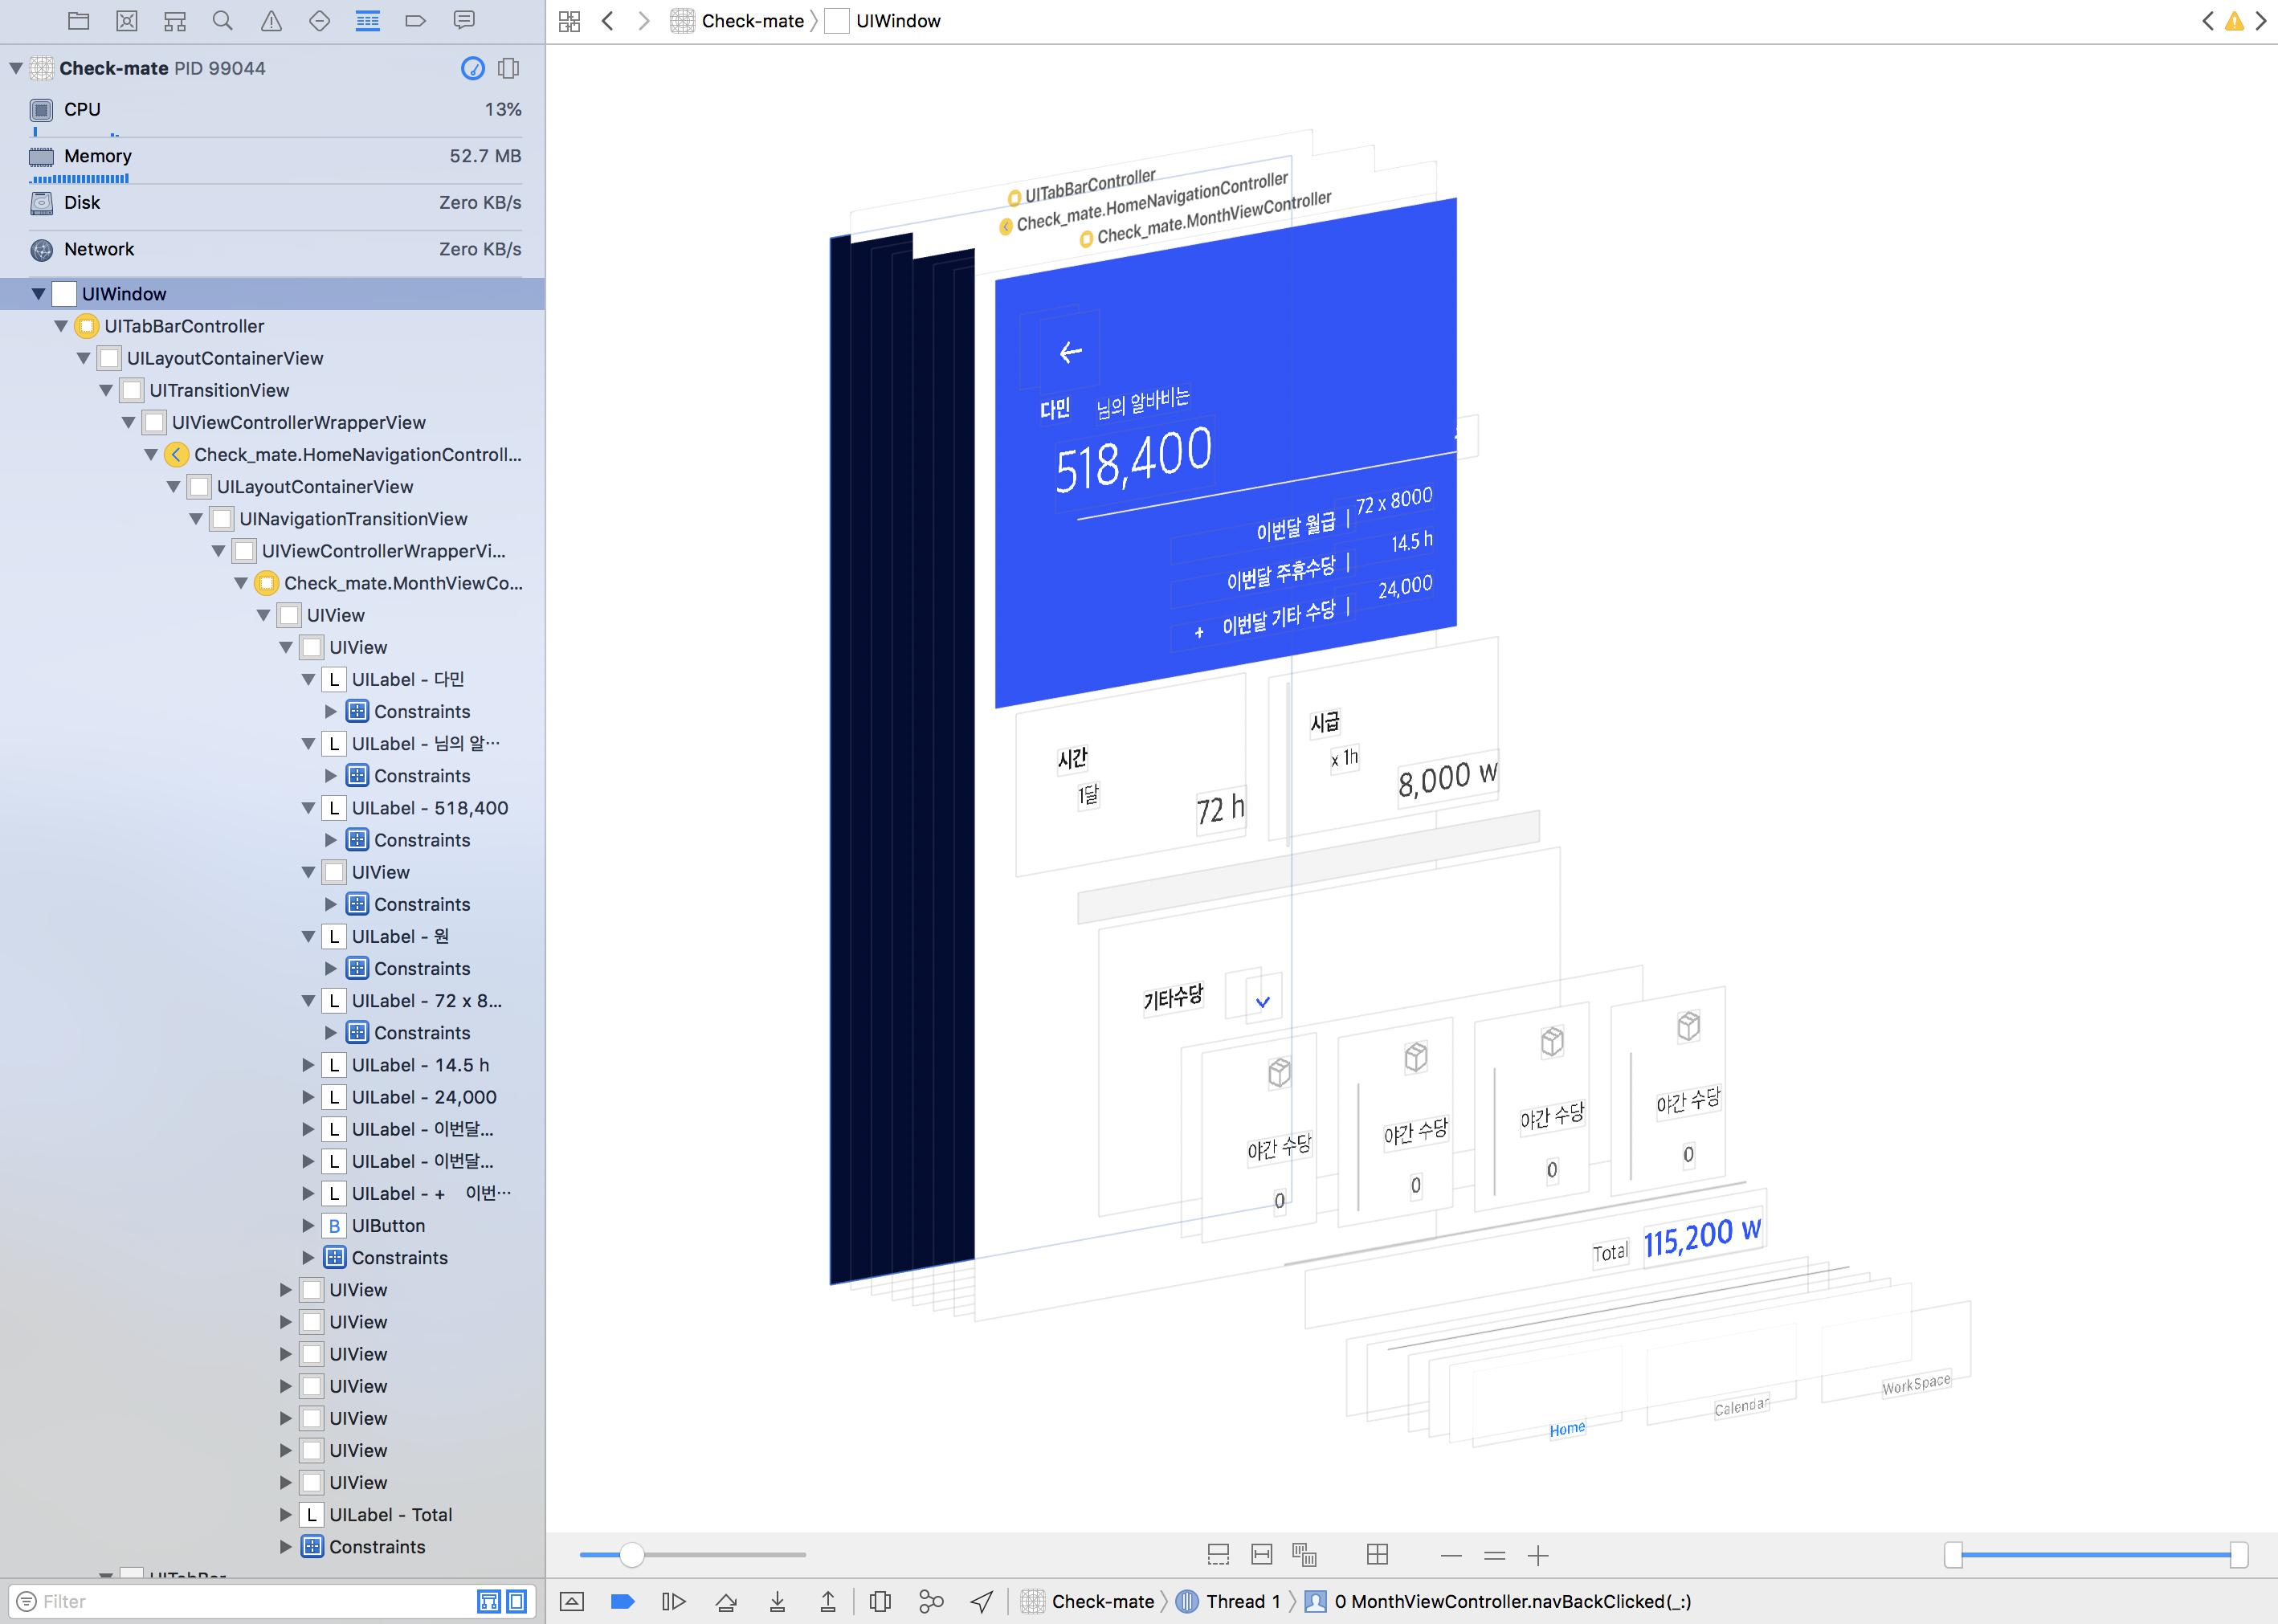 위와 같이 View Hierarchy를 확인 할 수 있고
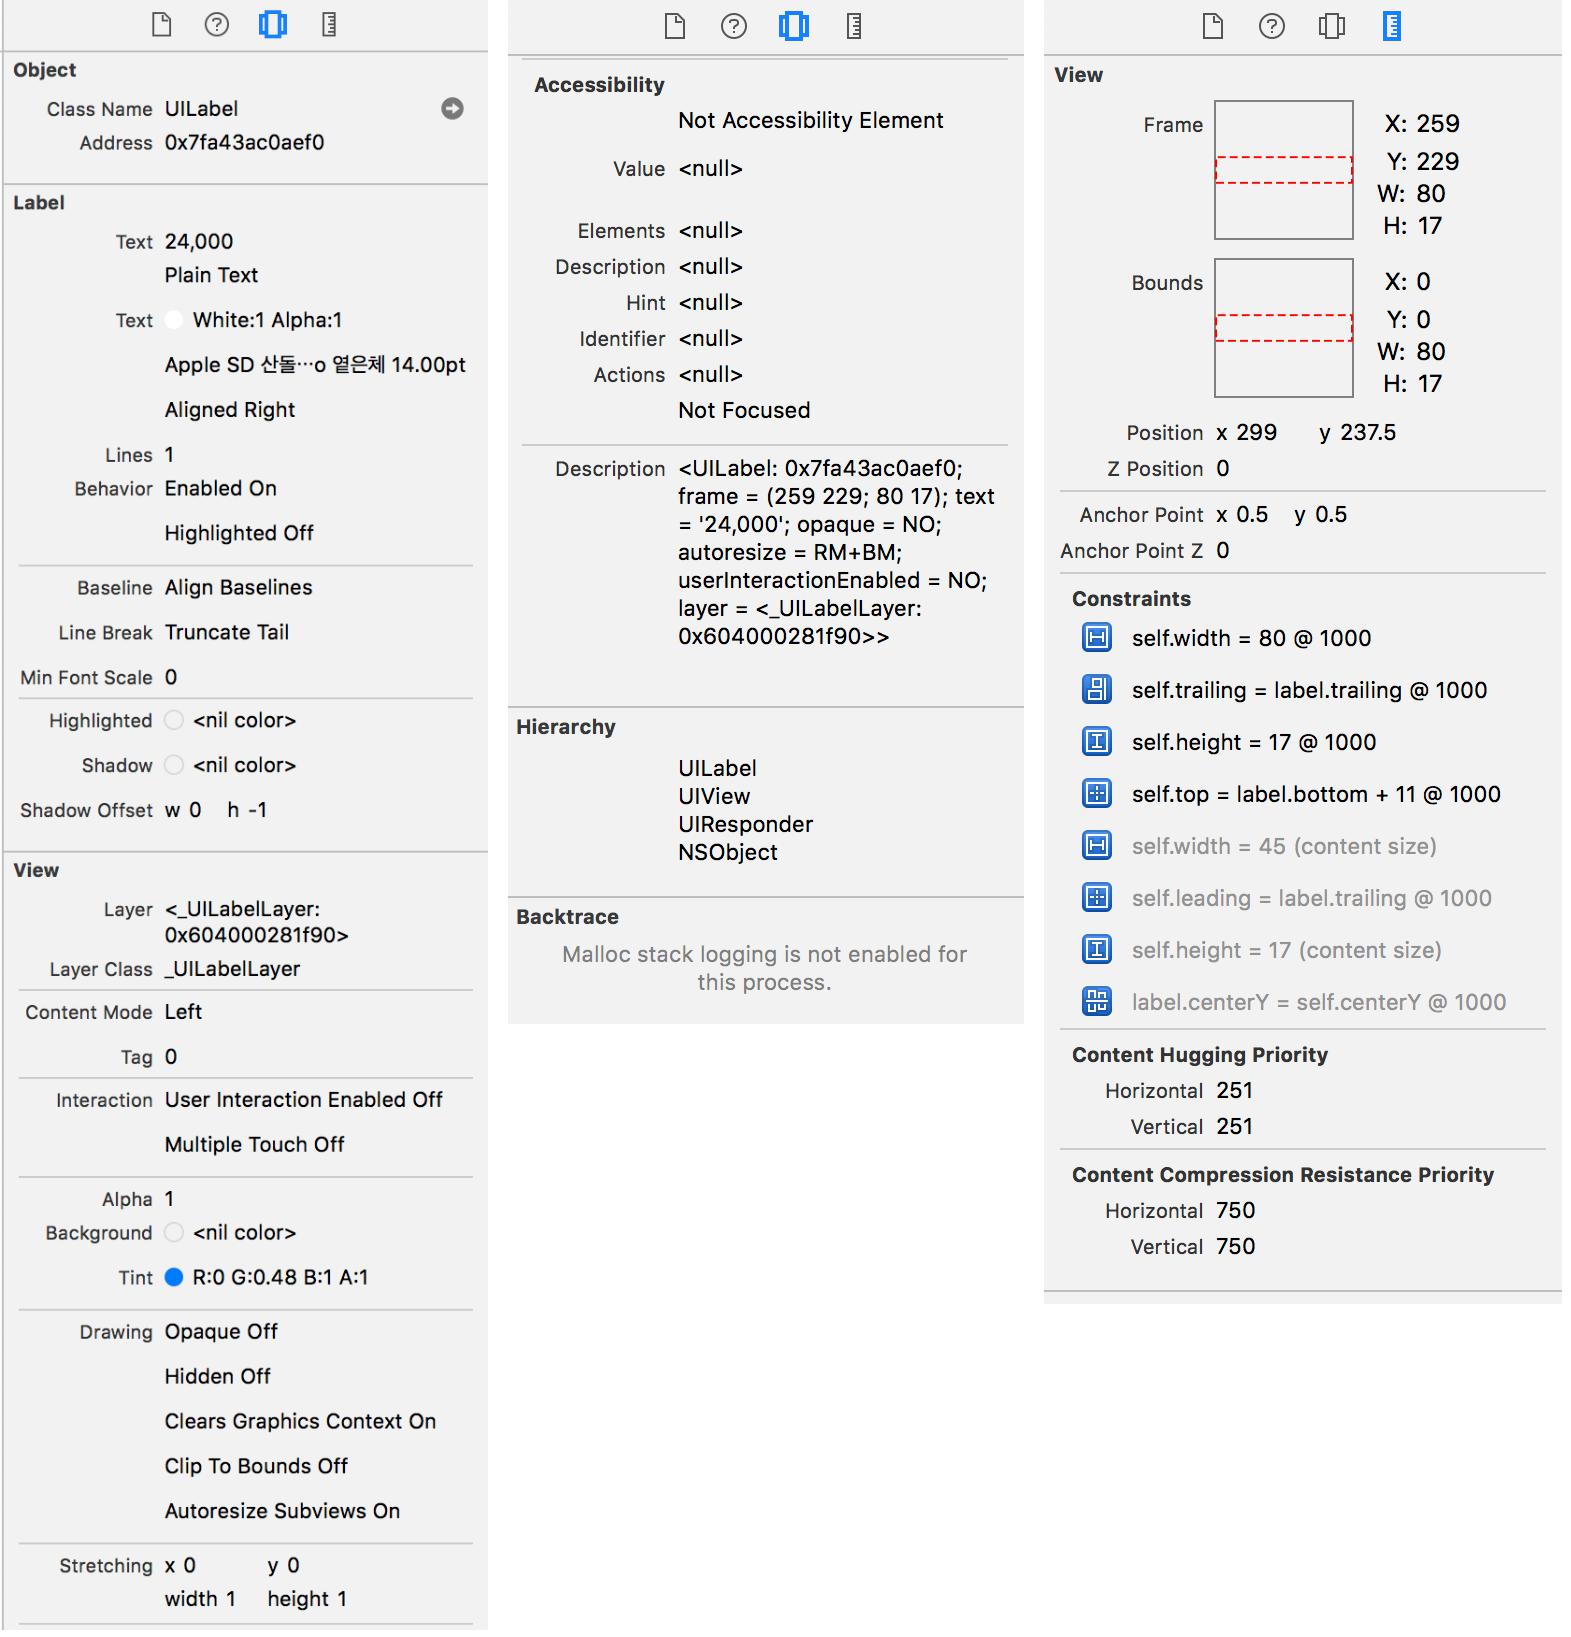 각각의 View 들의 Property, Size, Position 등을 확인할 수 있다.
2. 코드로 Layout Constraint 생성 하기
NSLayoutConstraint을 직접 생성하기
1 | NSLayoutConstraint(item: view1, |
Anchor를 이용하여 생성하기
1 | // NSLayoutYAxisAnchor : topAnchor, bottomAnchor, firstBaselineAnchor, lastBaselineAnchor, centerYAnchor |
2.3. Visual Format을 이용하여 생성하기
1 | let redView = UIView(frame: view.bounds) |
3. Stack View
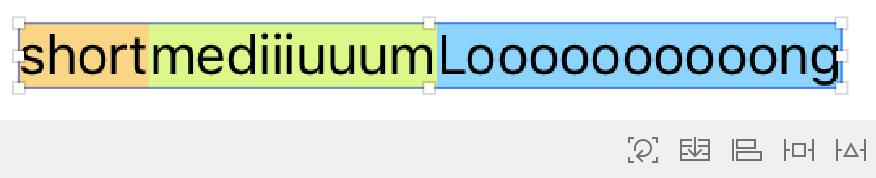
 위와 같이 라벨들의 최대 길이 만큼 UIImageView가 밀리는 UI를 구현한다고 가정하자.
어떤 방식으로 구현해야 할까?
다양한 방법이 있겠지만 UIStackView를 사용하면 간단하게 구현할 수 있다.
UIImageView의 위치를 UIStackView의 Trailing에 연결하면 된다.
UIStackView의 Width는 별도의 Constraint없이 안의 View들의 크기에 따라 자동으로 결정되기 때문이다.
위와 같이 라벨들의 최대 길이 만큼 UIImageView가 밀리는 UI를 구현한다고 가정하자.
어떤 방식으로 구현해야 할까?
다양한 방법이 있겠지만 UIStackView를 사용하면 간단하게 구현할 수 있다.
UIImageView의 위치를 UIStackView의 Trailing에 연결하면 된다.
UIStackView의 Width는 별도의 Constraint없이 안의 View들의 크기에 따라 자동으로 결정되기 때문이다.
Stack View 생성/해제 하기
 위와 같이 여러 개의 View를 선택한 다음 아래의 저 버튼을 누르면
 위와 같이 선택 했던 View를이 연결되면서 StackView로 감싸집니다.
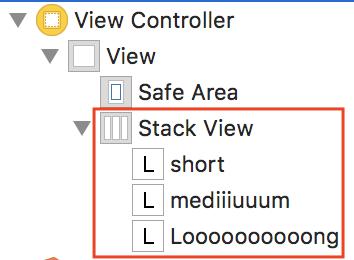 View hierarchy는 위와 같습니다.
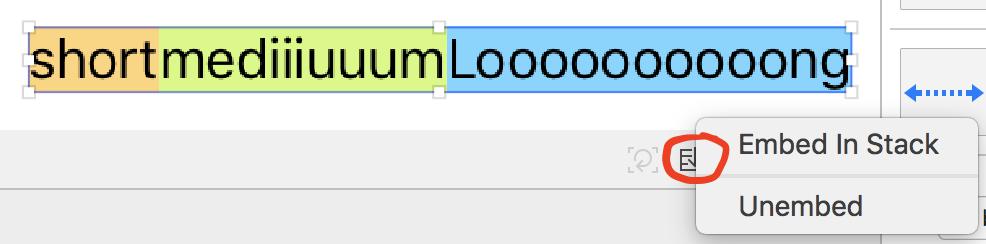 StackView를 해제하려면 alt 키를 누른 상태로 Stack 버튼을 누른 뒤, Unembed 버튼을 누르면 됩니다
Stack View의 Constraint
Stack View도 다른 View들과 마찬가지로 X Position, Y Position, Width, Height가 Constraint로 지정이 되어야 한다.
 UILabel들로만 이루어진 UIStackView는 각각의 UILabel의 사이즈를 추정할 수 있기 때문에
X, Y Position Constraint만 있어도 되지만
UILabel들로만 이루어진 UIStackView는 각각의 UILabel의 사이즈를 추정할 수 있기 때문에
X, Y Position Constraint만 있어도 되지만
 UIView로 이루어진 UIStackView와 같은 경우에는 각각의 사이즈를 추정할 수 없기 때문에
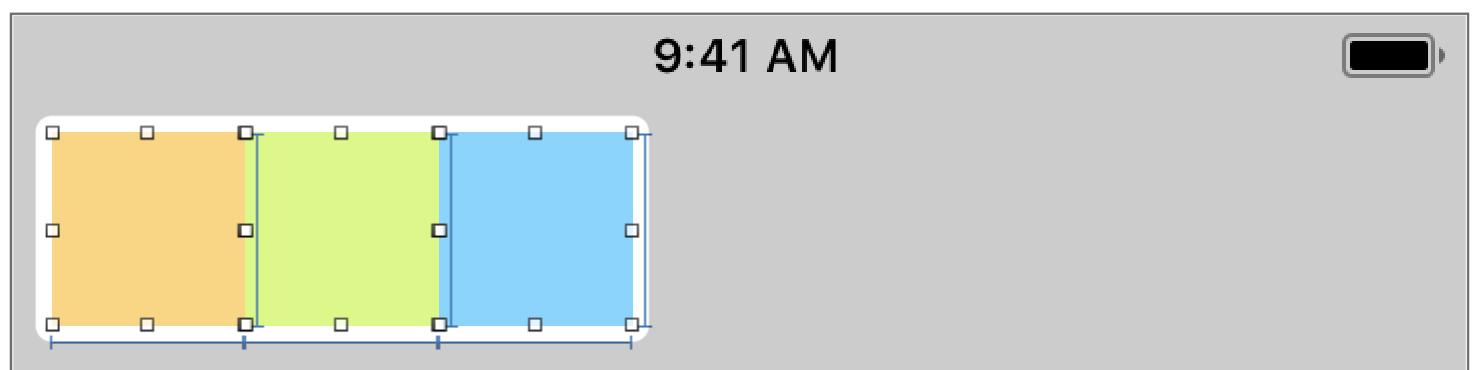 위와 같이 UIStackView안의 각각의 View마다 Width와 Height Constraint를 넣어주어
StackView가 자신의 크기를 계산할 수 있게 해야 한다.
위와 같이 UIStackView안의 각각의 View마다 Width와 Height Constraint를 넣어주어
StackView가 자신의 크기를 계산할 수 있게 해야 한다.
 StackView가 자신의 크기를 계산할 수 있다면 굳이 모든 View에 Width와 Height Constraint를 넣지 않아도 된다.
위와 같은 경우에는 첫 번째, 두 번째 View는 Width Constraint만 마지막 View는 Width, Height Constraint를 넣어주었다.
Editor에서나 실제 앱을 구동할 때나 잘 동작한다.
StackView가 자신의 크기를 계산할 수 있다면 굳이 모든 View에 Width와 Height Constraint를 넣지 않아도 된다.
위와 같은 경우에는 첫 번째, 두 번째 View는 Width Constraint만 마지막 View는 Width, Height Constraint를 넣어주었다.
Editor에서나 실제 앱을 구동할 때나 잘 동작한다.
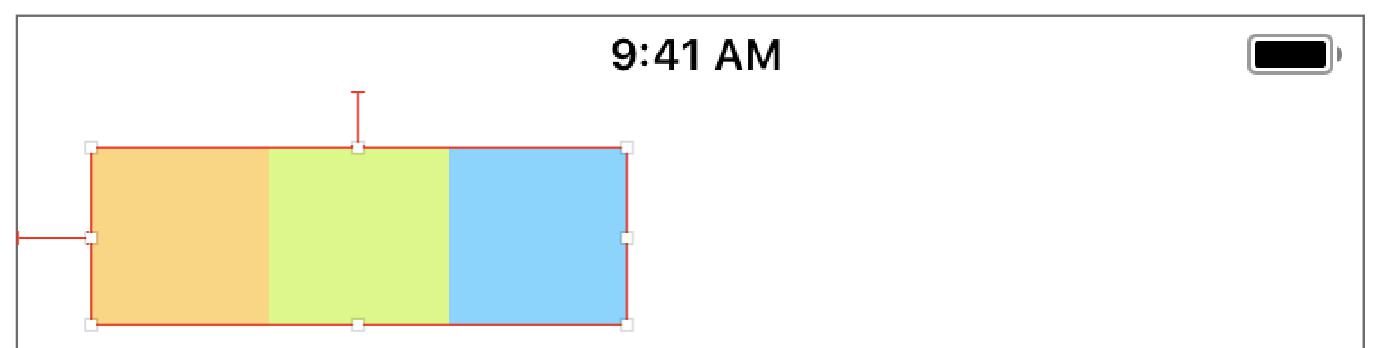
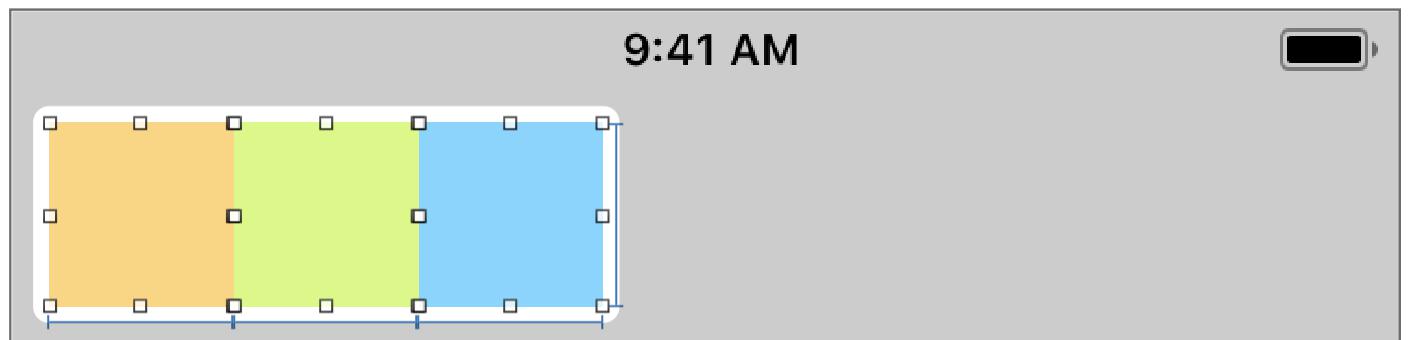
 만일 위처럼 각각의 View에 Width, Height Constraint를 넣지 않고 그냥 StackView에
Width, Height Constraint를 넣어주면 StackView에는 모호성이 없다고 나오지만
만일 위처럼 각각의 View에 Width, Height Constraint를 넣지 않고 그냥 StackView에
Width, Height Constraint를 넣어주면 StackView에는 모호성이 없다고 나오지만
 각각의 View들을 클릭하면 X Position의 모호함이 빨간색으로 나타나고 있고
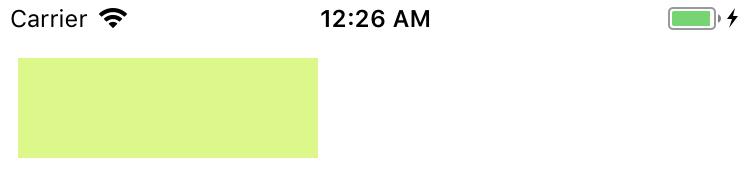 실제로 앱을 구동하면 위와 같이 이상하게 나온다.
주어진 정보 만으로는 StackView의 위치와 크기는 정할 수 있어도
안의 각각의 View들의 크기와 위치를 계산할 수 없기 때문이다.
실제로 앱을 구동하면 위와 같이 이상하게 나온다.
주어진 정보 만으로는 StackView의 위치와 크기는 정할 수 있어도
안의 각각의 View들의 크기와 위치를 계산할 수 없기 때문이다.
Stack View Distribution
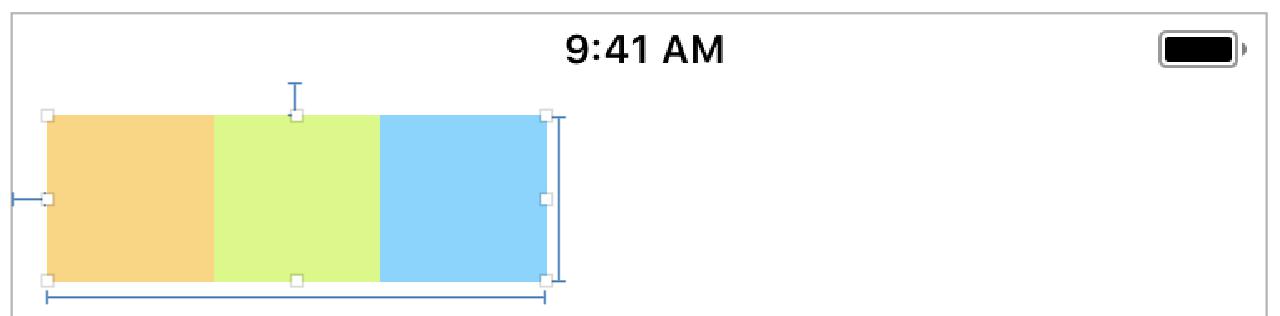
 위와 같이 X, Y 위치 Constraint만 있는 UIStackView에 현재 길이보다 더 긴 Width Constraint를 넣어주면 어떻게 될까?
이를 위한 옵션이 5가지가 있다.
위와 같이 X, Y 위치 Constraint만 있는 UIStackView에 현재 길이보다 더 긴 Width Constraint를 넣어주면 어떻게 될까?
이를 위한 옵션이 5가지가 있다.
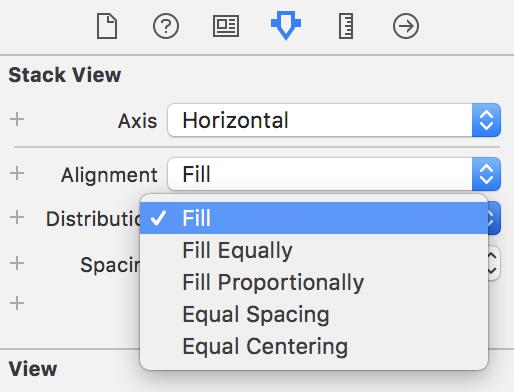
Fill
위와 같이 늘어날 수 있는 View를 늘린다.Fill Equally
 원래 크기와 상관 없이 무조건 모든 뷰에 같은 크기를 분배한다.
Fill Proportionally
 원래 크기에 비례하여 남는 공간을 분배한다.
예를 들어 원래 크기가 1:2:3 이고 남는 공간이 60일 경우
각각의 View에게 10, 20, 30의 공간을 부여하는 것이다.
원래 크기에 비례하여 남는 공간을 분배한다.
예를 들어 원래 크기가 1:2:3 이고 남는 공간이 60일 경우
각각의 View에게 10, 20, 30의 공간을 부여하는 것이다.Equal Spacing
 남는 공간을 균일하게 나눠서 View 사이에 Space를 둔다.
Equal Centering
 각각의 뷰들의 Center 사이의 길이를 모두 같게 한다.
4. Intrinsic Content Size
모든 뷰들은 고유의 Intrinsic Content Size 가 있습니다.
UILabel과 같이 해당 View의 속성만을 가지고 크기를 예측할 수 있는 경우
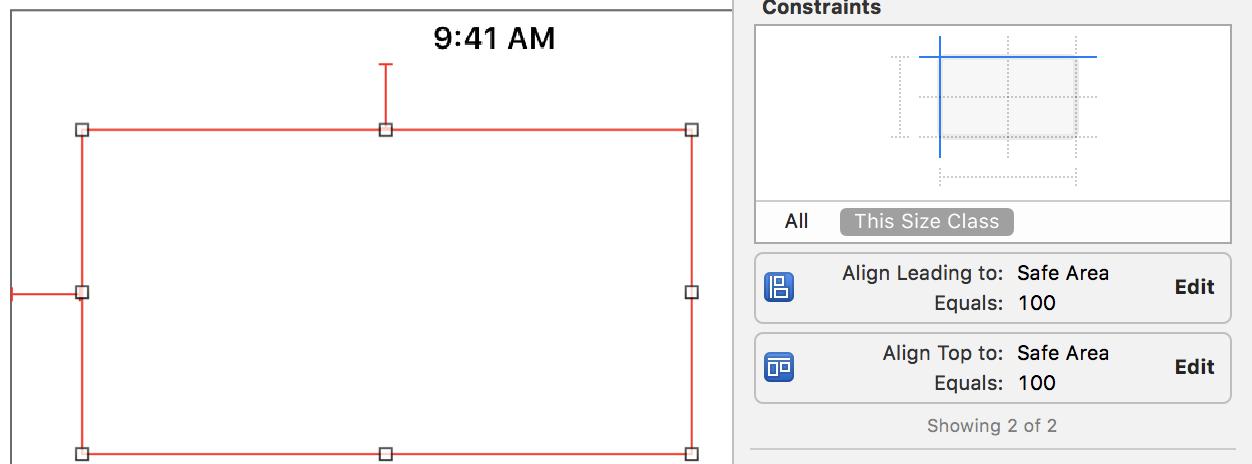
위와 같이 그냥 UIView는 width와 height가 결정되지 않아 빨간색으로 오류가 뜨지만
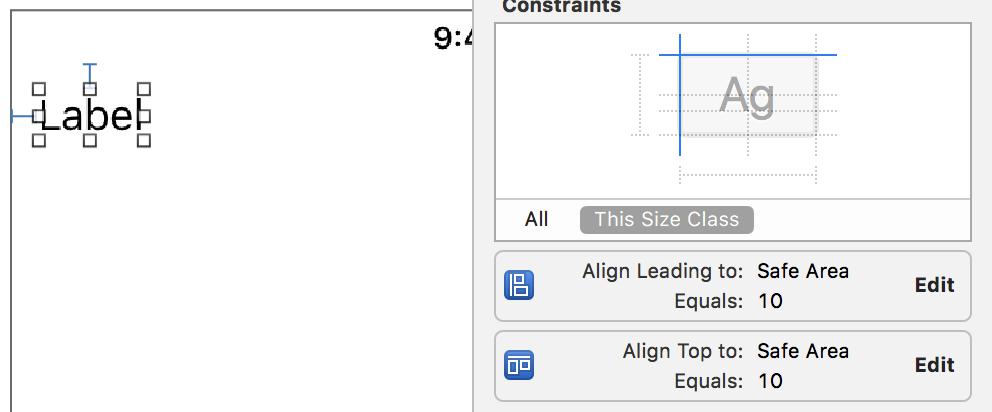
내용과 폰트 크기 만으로 Size를 예측할 수 있는 UILabel의 경우 Intrinsic Content Size가 결정되어서 오토레이아웃의 에러가 뜨지 않습니다.
1 | class CustomView: UIView { |
Intrinsic Content Size는 UIView.intrinsicContentSize에 접근하여 알아낼 수 있습니다. 또한 위와 같이 CustomView를 만들 때 intrinsicContentSize를 override 할 수도 있습니다. 만약에 intrinsicContentSize가 변했을 경우 invalidateIntrinsicContentSize()를 호출해줘야 합니다.
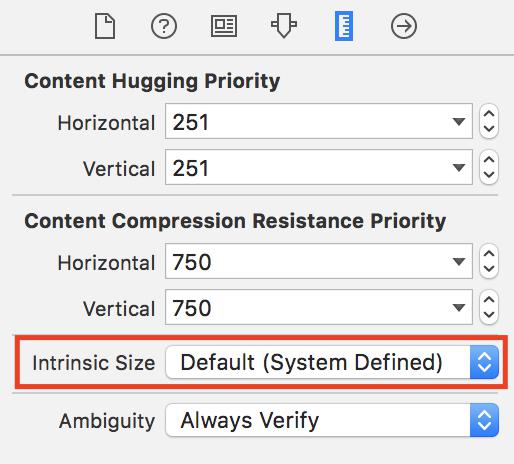
5. Content Hugging Priority
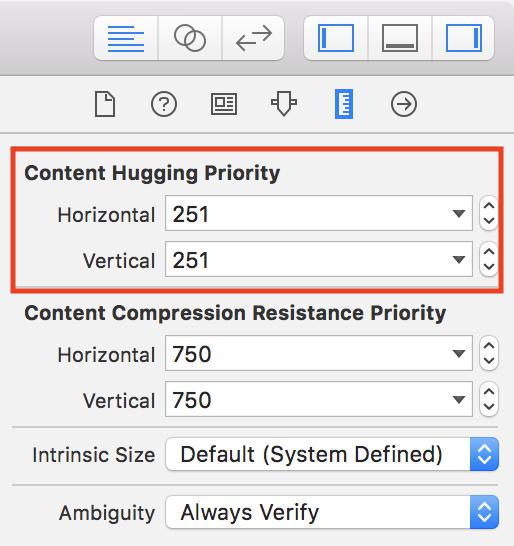 Size Insepector의 Content Hugging Priority 입니다.
더 높은 Priority을 준다는 의미는 이 View가 intrinsic size 보다 커지지 않는다는 것을 의미합니다.
Size Insepector의 Content Hugging Priority 입니다.
더 높은 Priority을 준다는 의미는 이 View가 intrinsic size 보다 커지지 않는다는 것을 의미합니다.
 labe1의 Content Hugging Priority는 251
labe2의 Content Hugging Priority는 251
일 때 입니다.
빨간색이 되어 있는 것을 볼 수 있습니다.
 labe1의 Content Hugging Priority는 252로 올린 결과 입니다.
6. Content Compression Resistance Priority
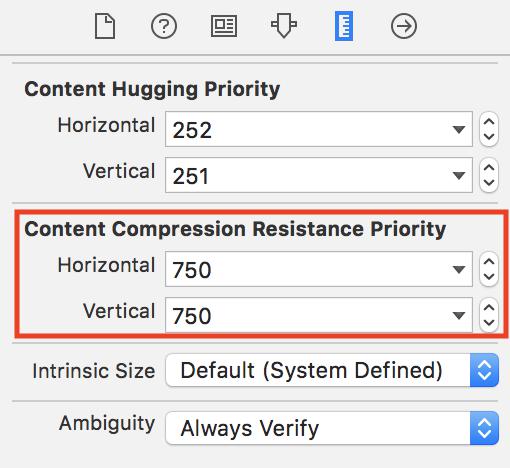 Size Insepector의 Content Hugging Priority 입니다.
더 높은 Priority을 준다는 의미는 이 View가 intrinsic size 보다 작아지 않는다는 것을 의미합니다.
Size Insepector의 Content Hugging Priority 입니다.
더 높은 Priority을 준다는 의미는 이 View가 intrinsic size 보다 작아지 않는다는 것을 의미합니다.
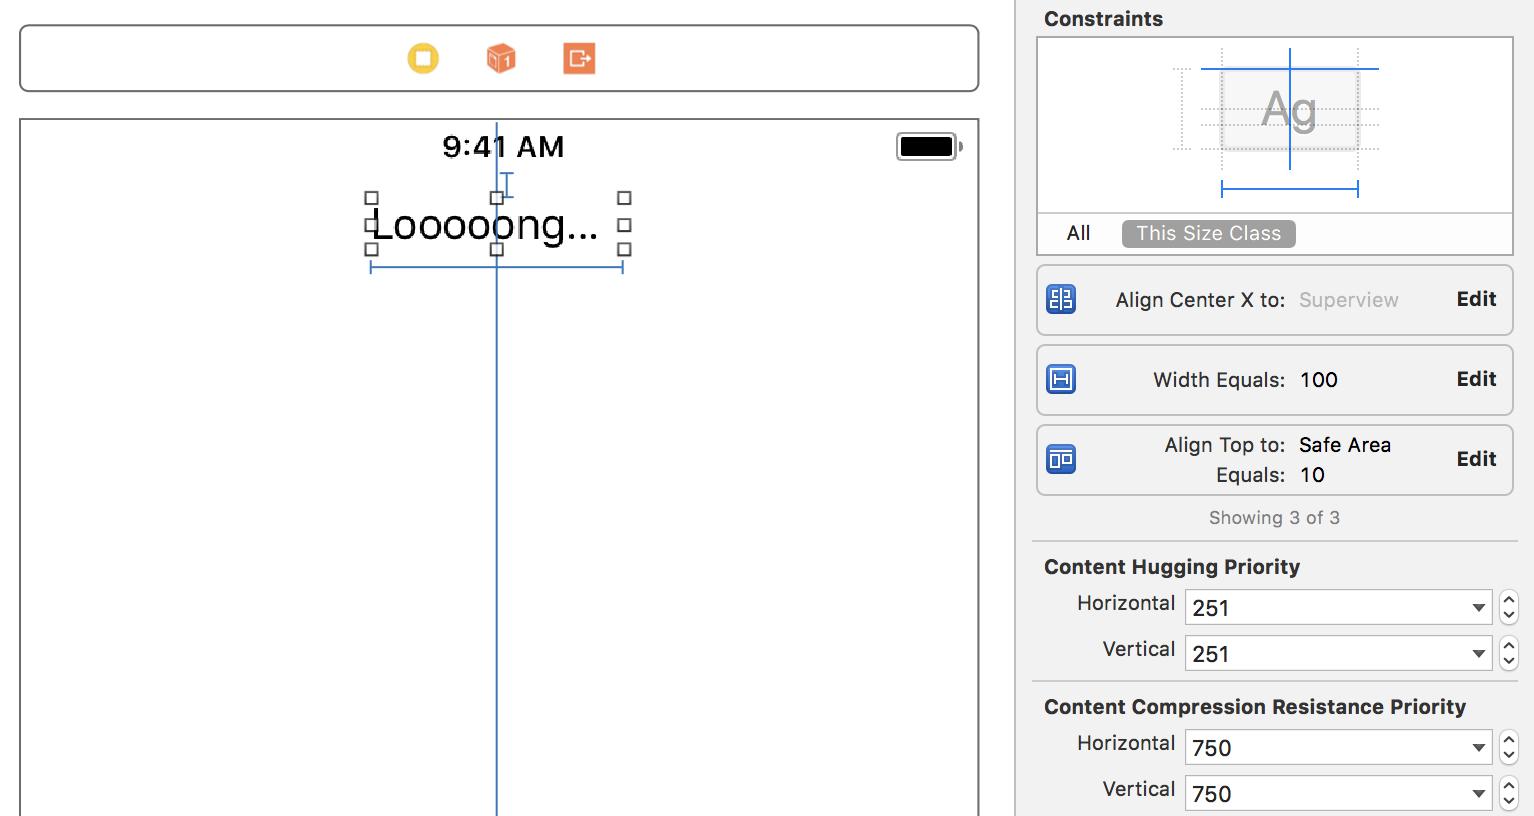 UILabel에 horizontal 위치, vertical 위치, width 이 3개의 constraint를 주고
내용을 width보다 길게 했을 경우에는 당연히 내용이 잘려서 끝에 …이 붙습니다.
UILabel에 horizontal 위치, vertical 위치, width 이 3개의 constraint를 주고
내용을 width보다 길게 했을 경우에는 당연히 내용이 잘려서 끝에 …이 붙습니다.
 하지만 width의 priority를 1로 만들어 horizontal Content Compression Resistance Priority 보다 작게 만들어줬을 경우에는
내용이 모두 보이는 것을 알 수 있습니다.
하지만 width의 priority를 1로 만들어 horizontal Content Compression Resistance Priority 보다 작게 만들어줬을 경우에는
내용이 모두 보이는 것을 알 수 있습니다.
참고
https://www.raywenderlich.com/174078/auto-layout-visual-format-language-tutorial-2
https://www.letmecompile.com/advanced-auto-layout/
http://rhammer.tistory.com/210
iOS 오토 레이아웃 파헤치기