슬랙과 깃허브 연동하기
슬랙과 깃허브 연동하기
1. Slack에 Github 앱 추가하기
먼저 좌상단의 워크스페이스 이름을 클릭한 후 Administration - Manage apps를 클릭합니다.
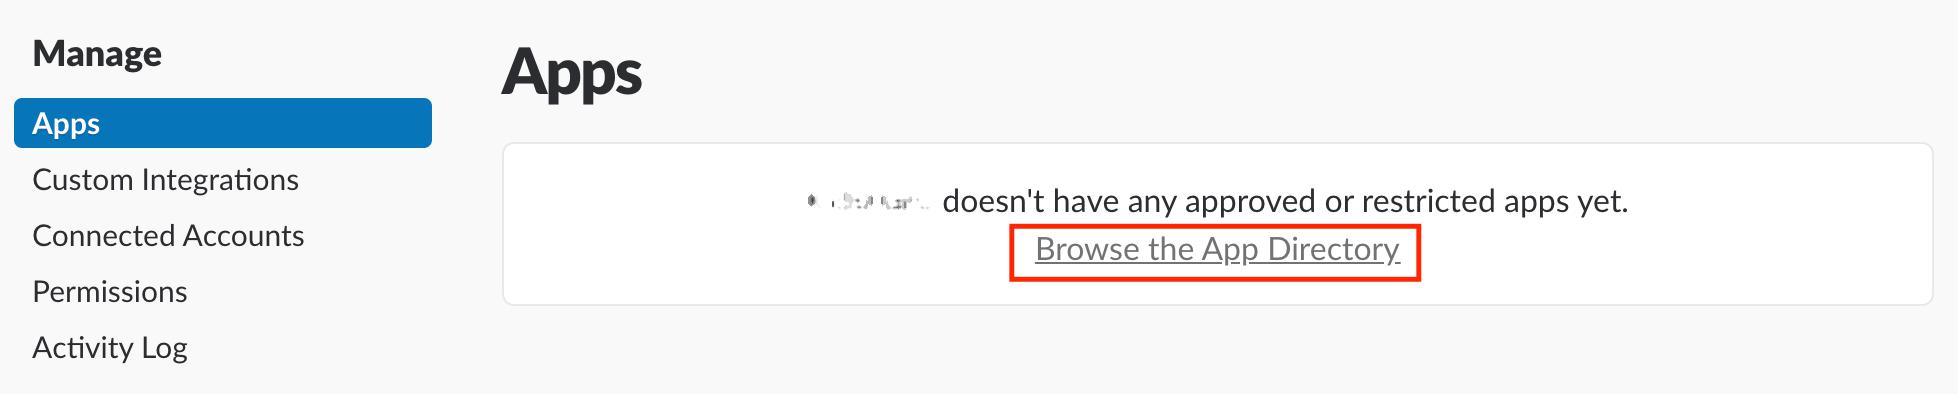
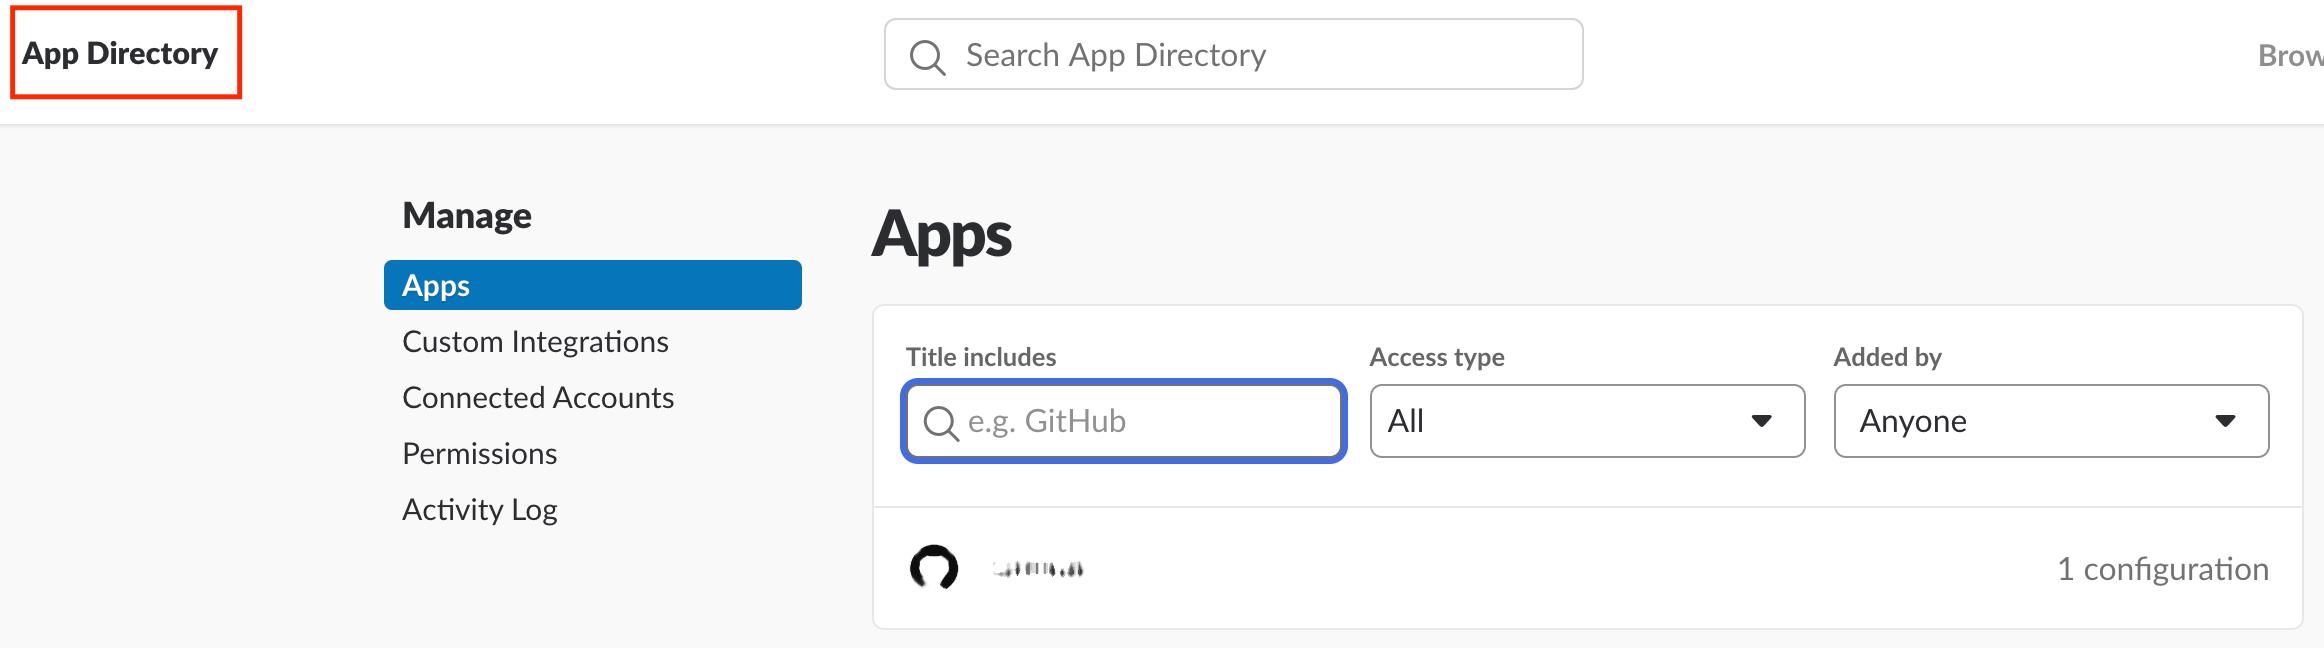
Browse the App Directory를 누릅니다. 만약 이전에 설치해 놓은 앱이 있으면 아래의 사진과 같이 뜨는데 그러면 App Directory를 누릅니다.
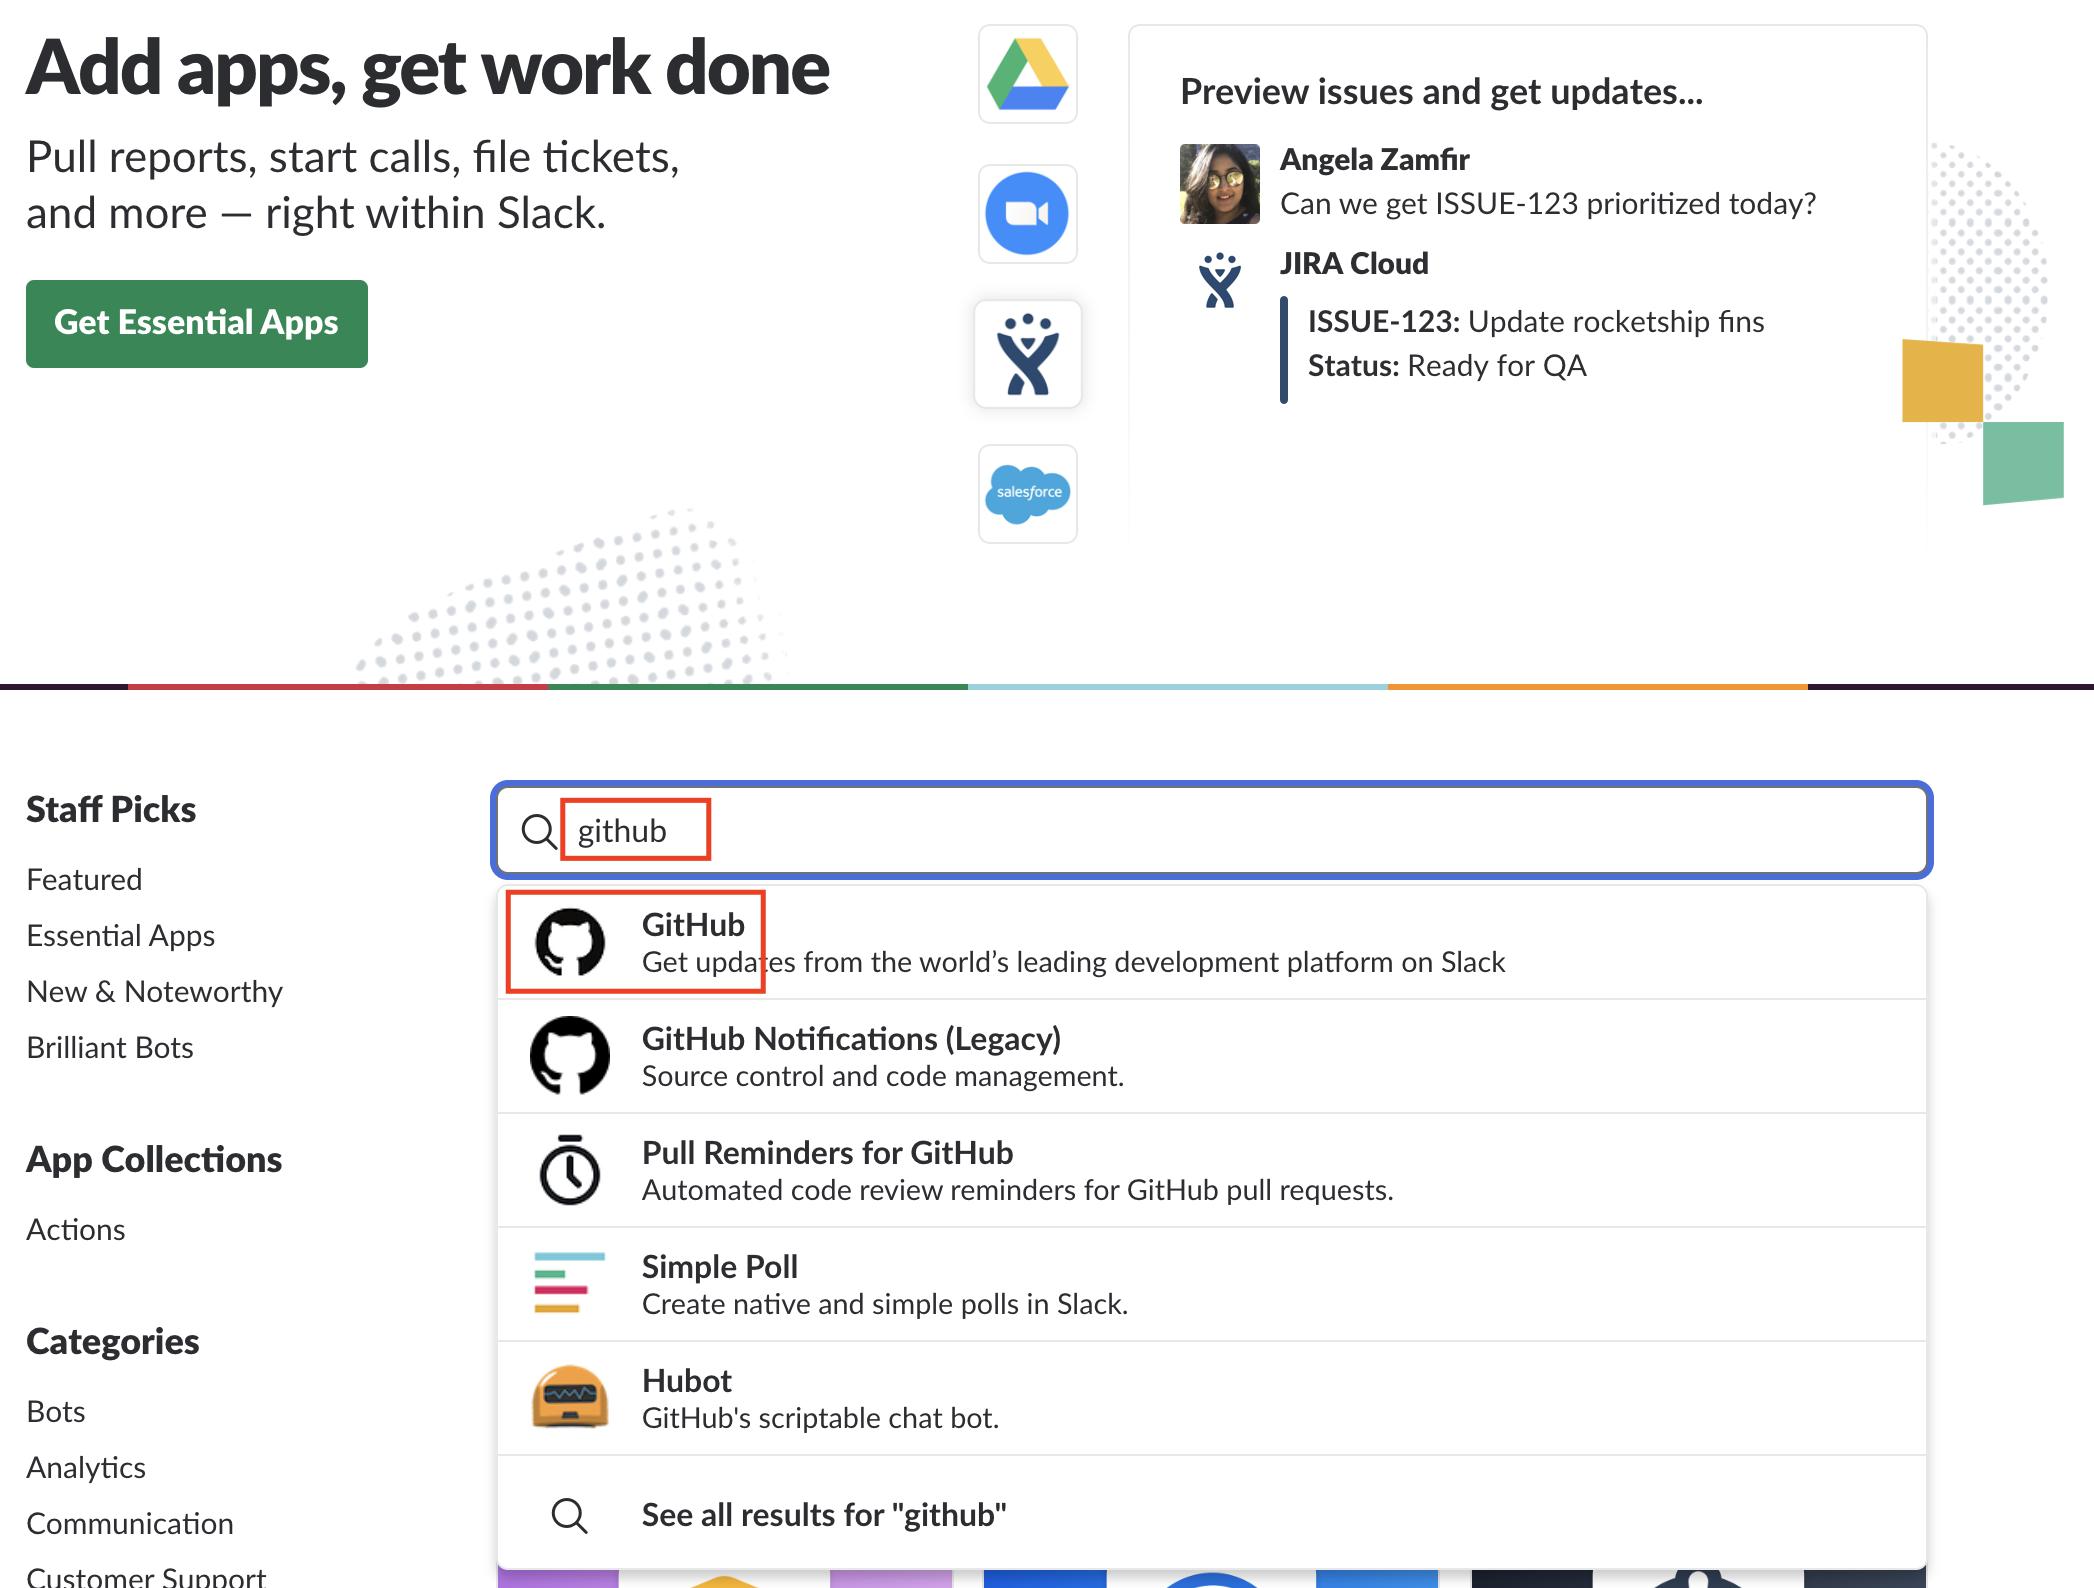
github를 검색한 후 맨 처음에 나온 Github를 클릭합니다. Legacy가 적힌 것은 Enterprise 계정 전용이라고 합니다.

Install을 누릅니다.
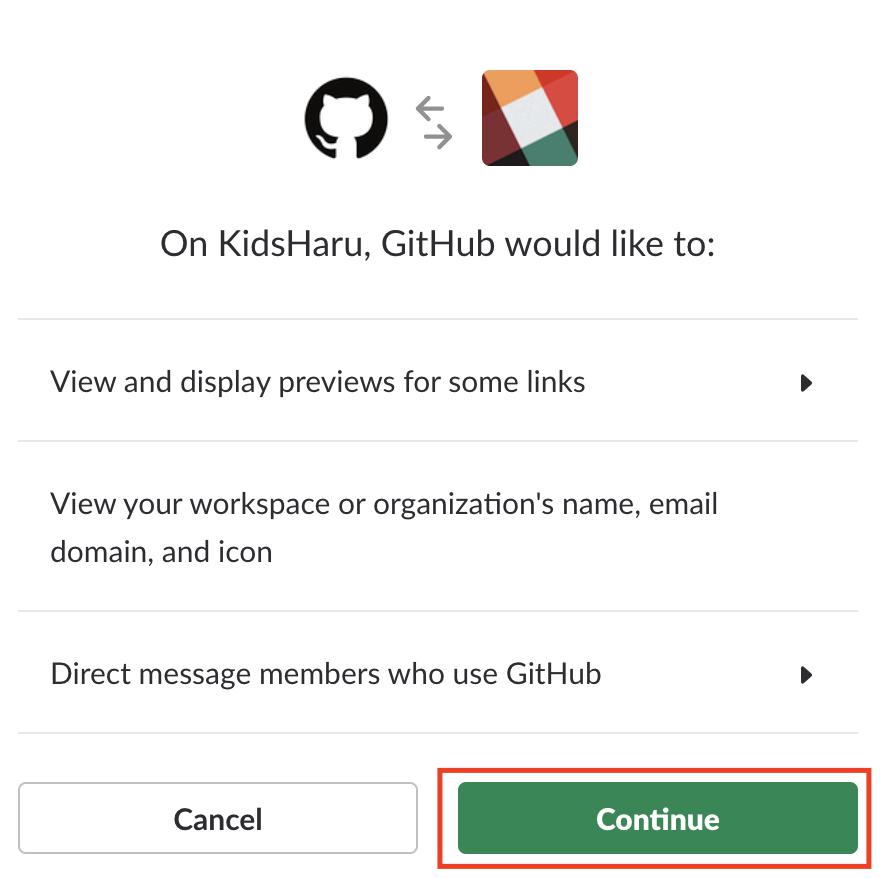
Continue를 누릅니다.
 이 Github 앱을 사용할 채널을 선택하는데 저와같이 원하는 채널만 선택하셔도 되고, 모든 채널을 선택하셔도 됩니다.
나중에 채널을 추가 할 수 있습니다. 여기서 선택 되지 않은 채널에서는 Github와의 연동을 할 수 없습니다.
이 Github 앱을 사용할 채널을 선택하는데 저와같이 원하는 채널만 선택하셔도 되고, 모든 채널을 선택하셔도 됩니다.
나중에 채널을 추가 할 수 있습니다. 여기서 선택 되지 않은 채널에서는 Github와의 연동을 할 수 없습니다.
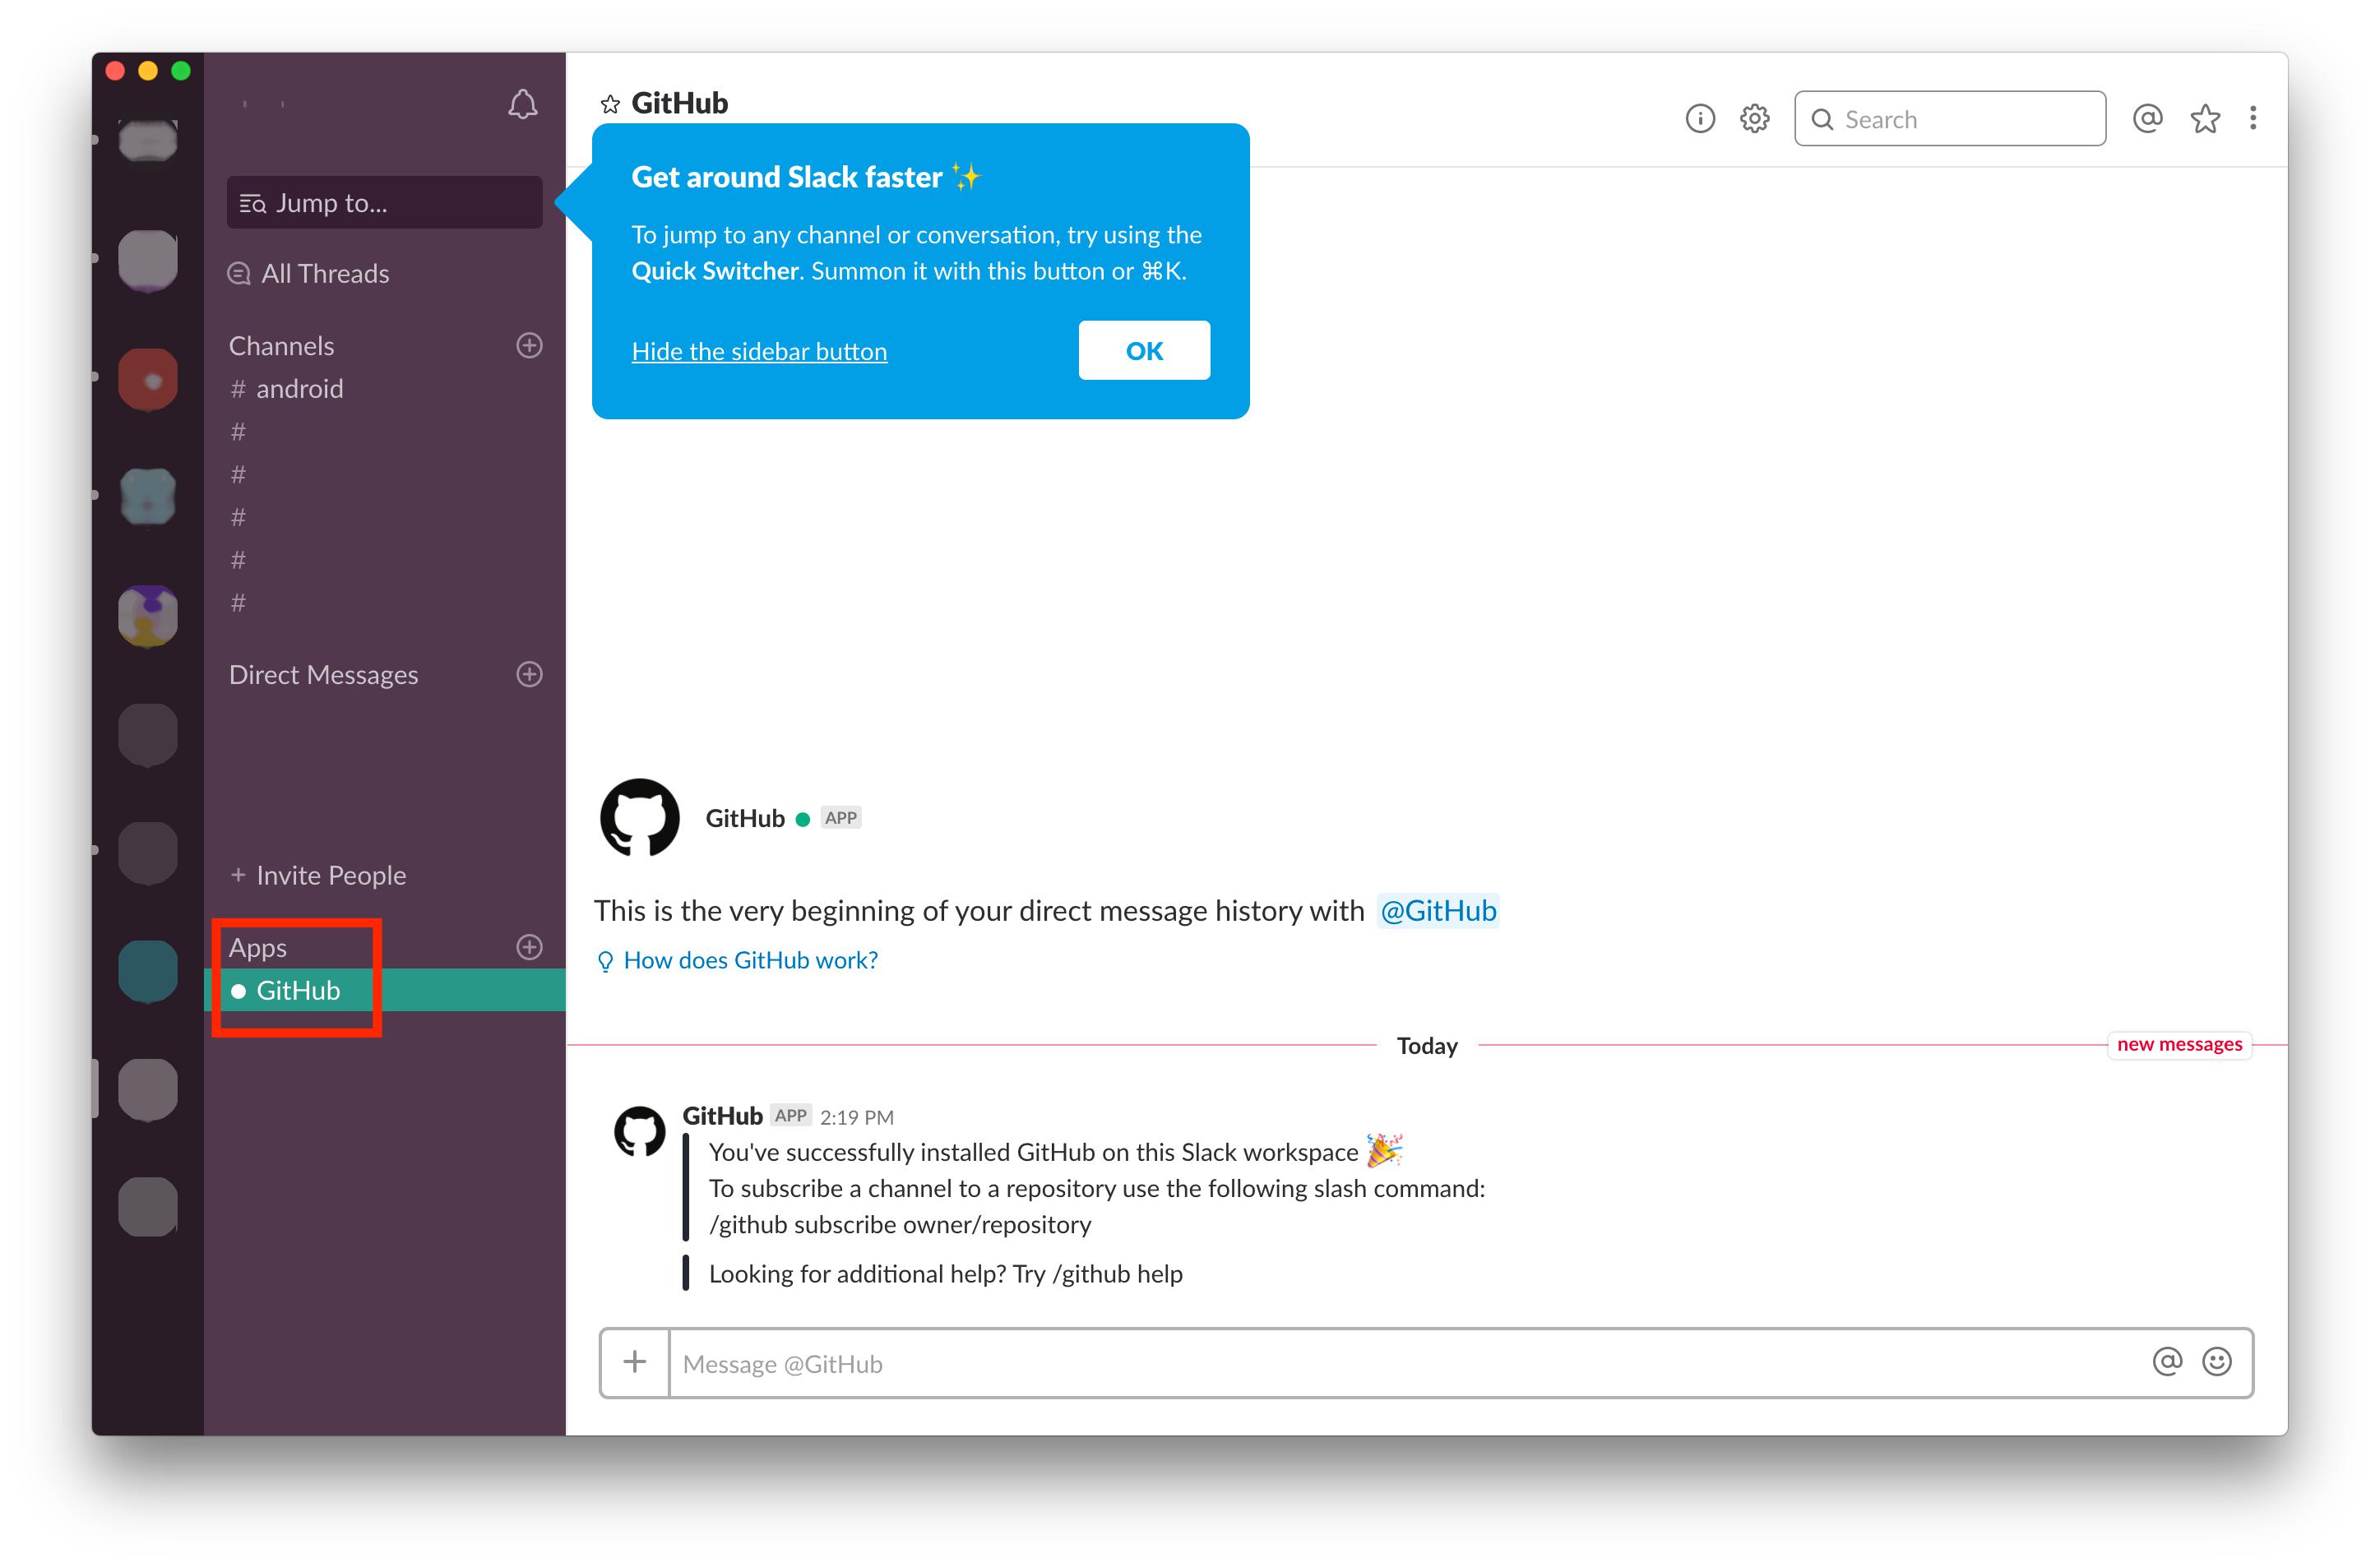 설치를 하게 되면 위와 같이 좌하단의 Apps에 Github가 추가된 것을 알 수 있습니다.
2. Github Repository와 연동하기

/github subscribe [연동하고 싶은 Repository URL]
원하는 채널에 가서 위와 같은 명령어를 입력합니다.
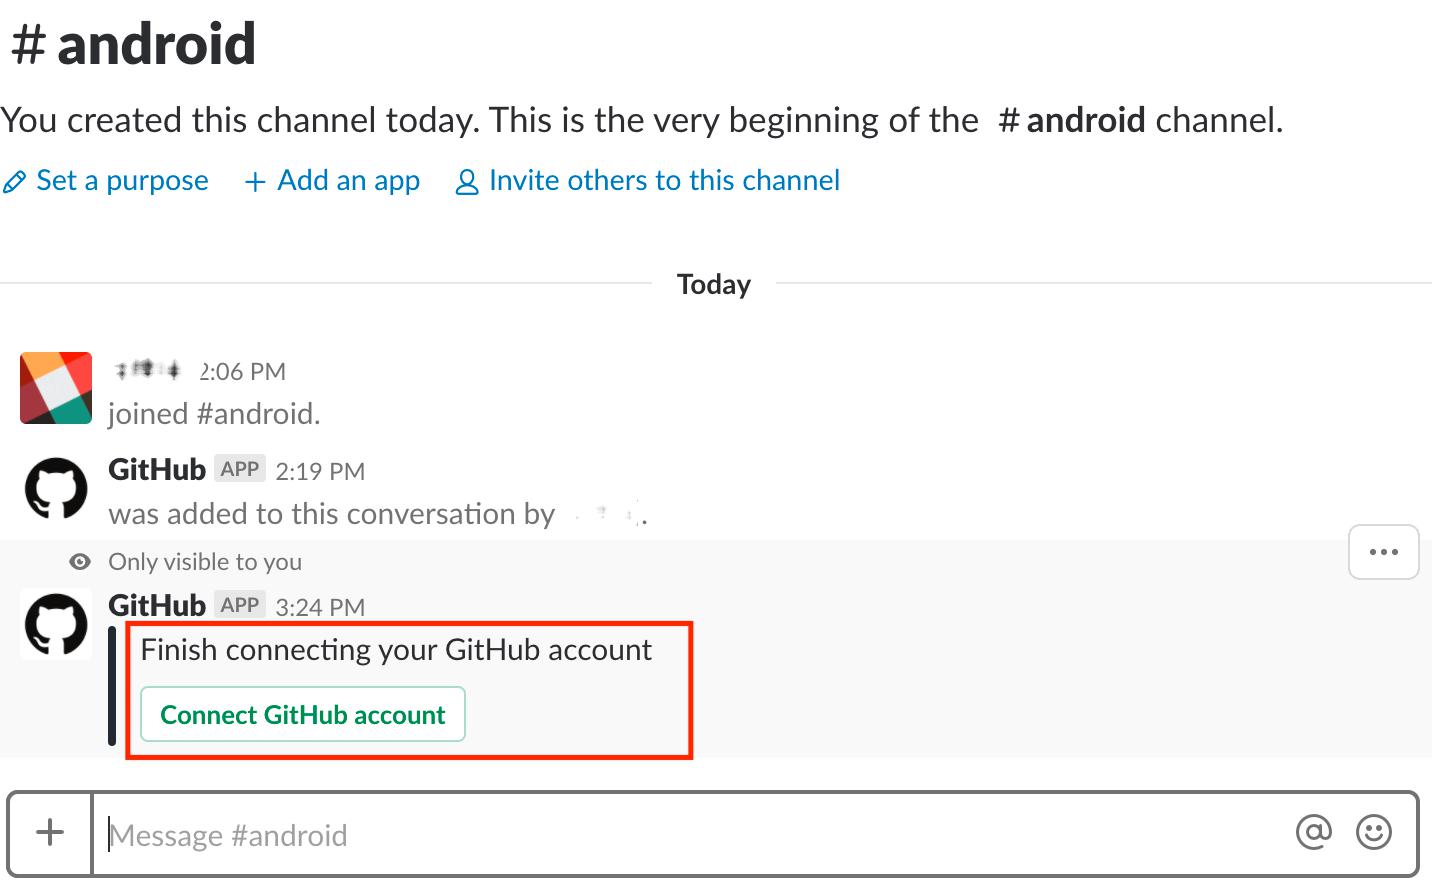 그러면 위와 같이 Github account를 연결해달라는 요청이 뜹니다.
 `Authorize Slack By Github`를 클릭하면 됩니다.
 연결을 원하는 Repository의 계정을 클릭합니다.
 원하는 Repository를 선택합니다.
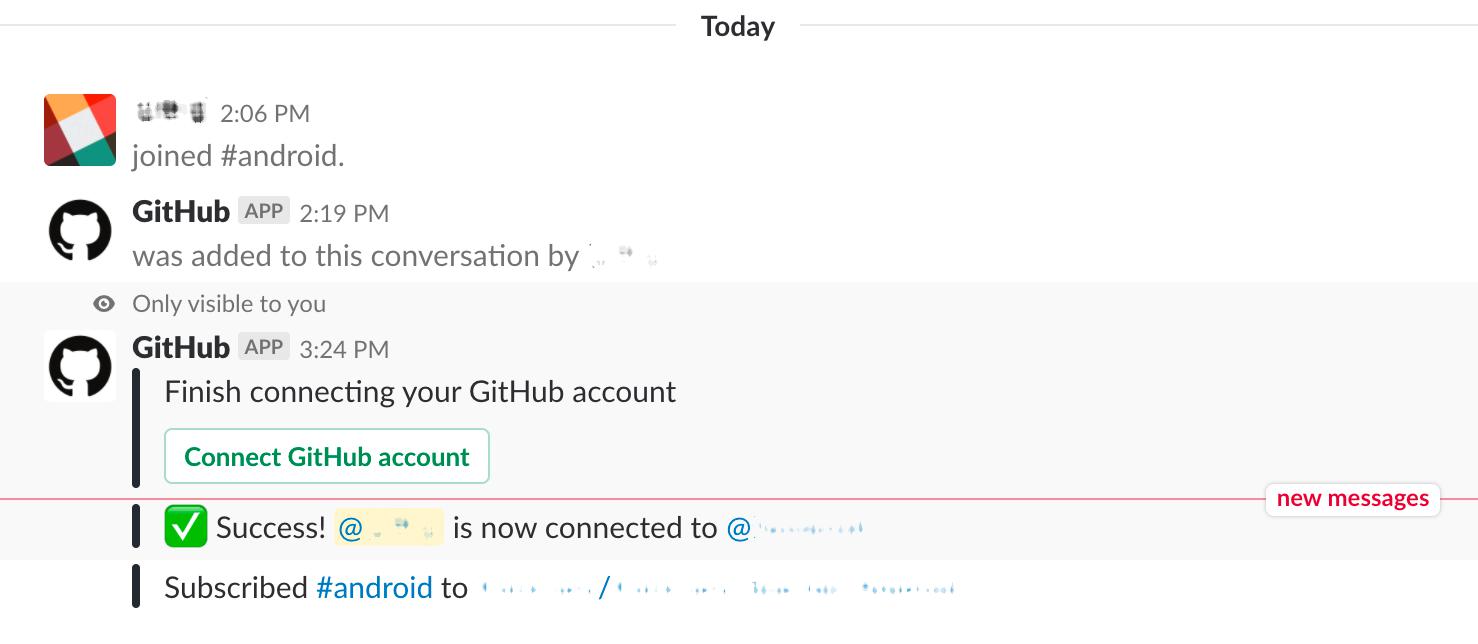 그려면 위와 같이 Repository와의 연결이 성공했다는 메시지가 뜹니다.
 이 Repository에 누군가 Commit을 하고 Push를 한다면 위와 같은 커멧 메시지가 뜹니다.
3. Slack에서 Github Issue 만들기

/github open [Issue를 만들고 싶은 Repository URL]
Issue를 만들고 싶은 Repository를 위와 같이 입력합니다.
 그러면 위와 같이 Issue를 만들 수 있는 창이 뜹니다. 원하는 정보를 입력한 후 `Open`을 누릅니다.
 그러면 위와 같이 Issue가 만들어졌다고 뜹니다.
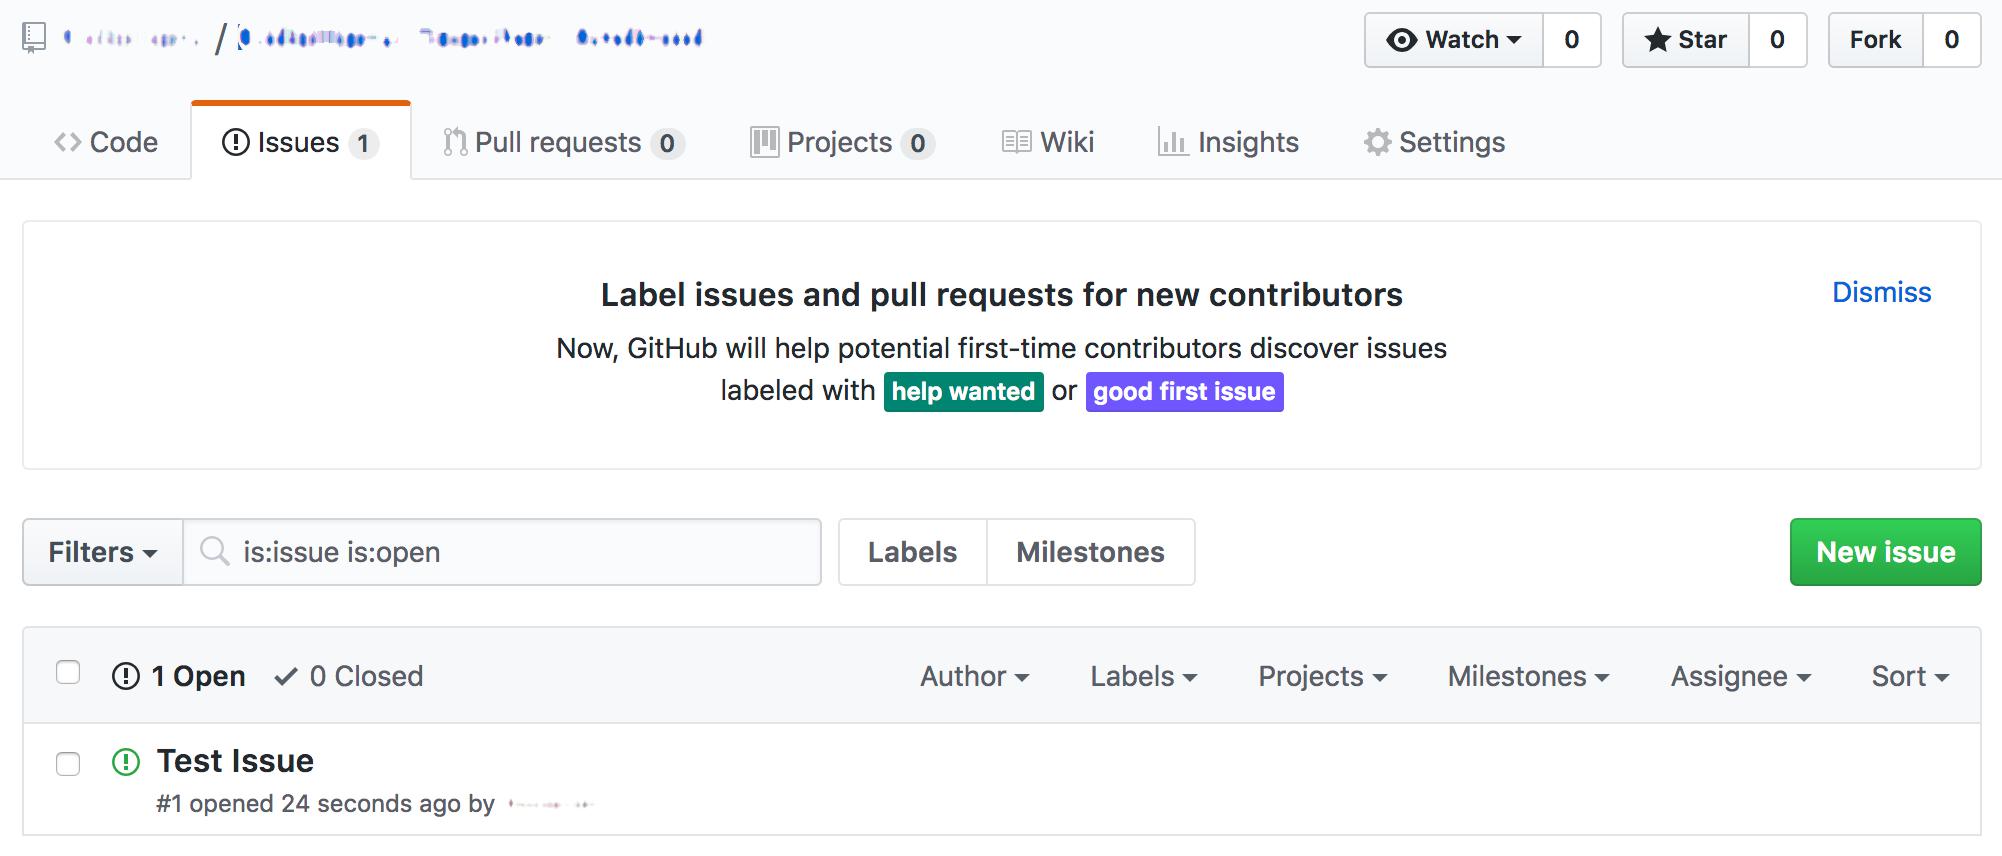 실제 Github에 가서도 정상적으로 Issue가 생성된 것을 알 수 있습니다.
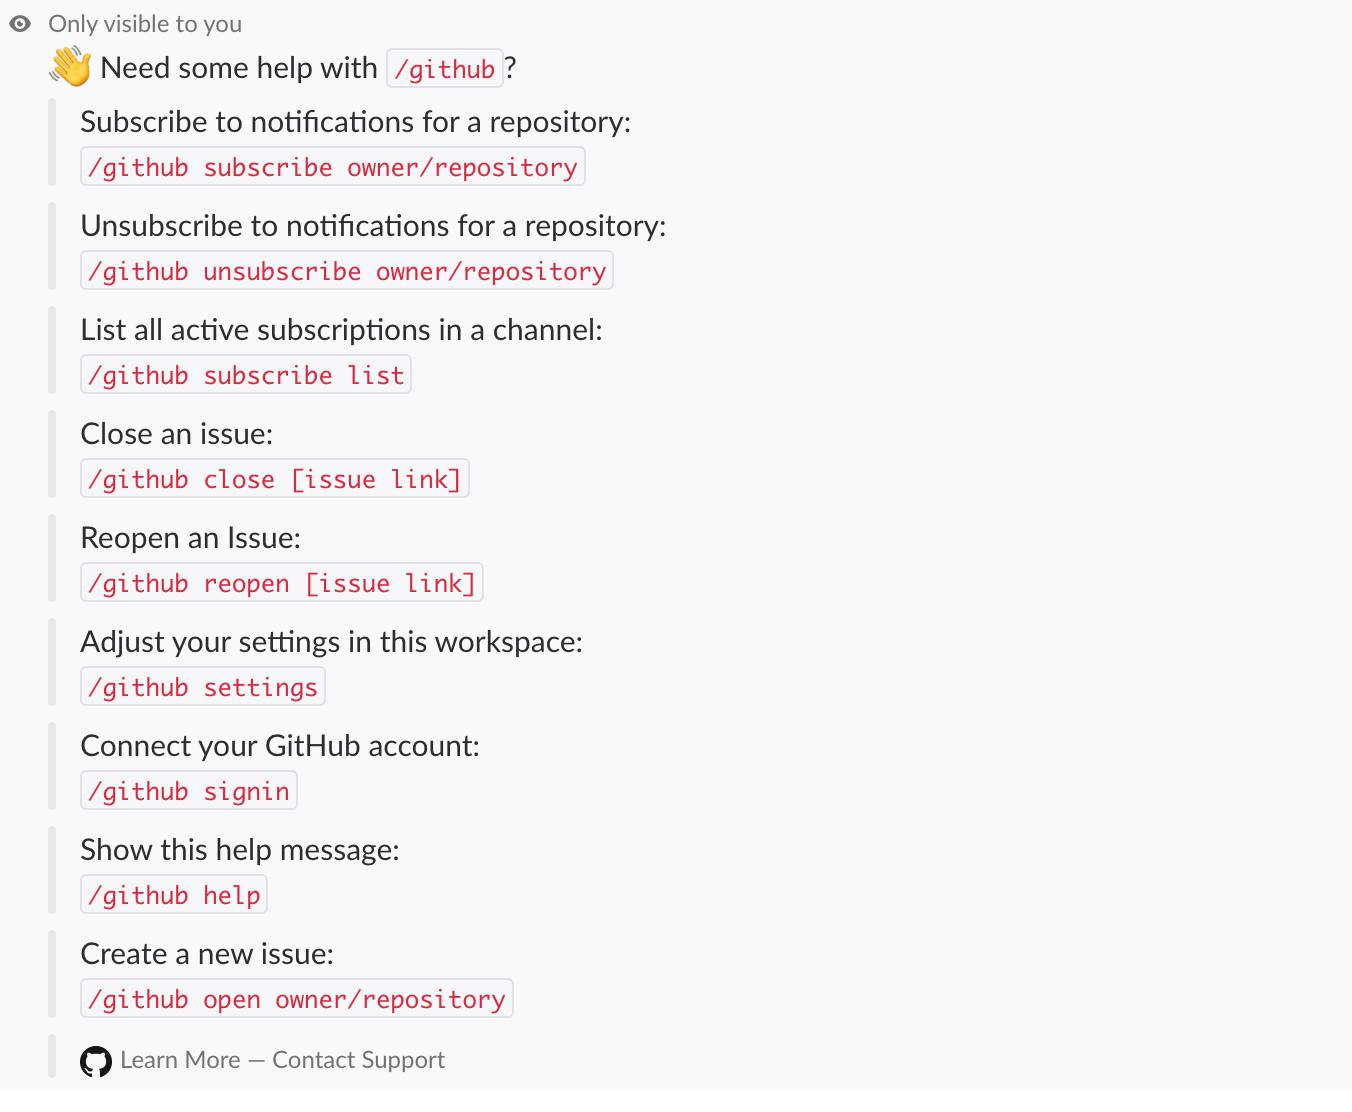
/github help 명령어를 통해 어떤 명령어가 있는지 알 수 있습니다.